I finally finished my second project of my year’s project challenge. OK, I had planned to finish it three weeks ago, but life is needy.
In any case, here it is. And I’m happy with it.
Premise
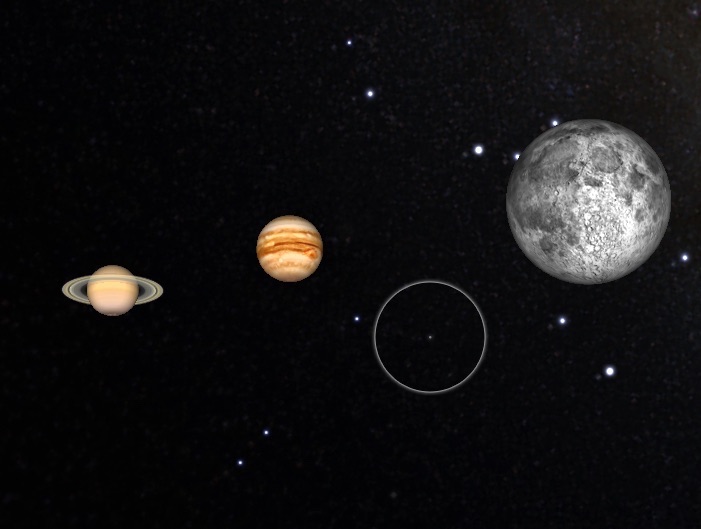
Earlier this year, I noticed how the Moon, Jupiter, and Saturn were all so close to each other. And I have a particular fascination with the full moon. On 04 July around midnight, when we were returning from a family gathering (outdoors, and members of our COVID-bubble, mind you), I looked up into the clear sky and the Moon was radiant, with Jupiter and Saturn blazing beside it, so close.
I’ve always been cognizant that when we see the Moon and the planets, that we’re seeing sunlight from different times. Everyone knows all the starlight we get has been traveling years (thousands, millions!) before we see it. The same applies to objects in our own solar system, of course.
The stats
Sunlight takes about 8.456 minutes to reach the Earth. The Moon is about 0.02108 light minutes from the Earth [I used this calculator to actually get the ephemera from 04jul20, 23:30, from my coordinates*]. Jupiter and Saturn are 34.559 and 75.1280 light minutes from Earth.
That means while the sunlight we see from the Moon is almost the same you’d see from the day side of Earth, Jupiter and Saturn light are about 1h9m and 2h30m old.
So how to visualize that?
Blinkies
I knew I was going to use LEDs to make this concept more tangible. Obviously.
For the structure, I knew it’d be like a display of some sort. I looked into free form stuff, played with different designs, played with the math. In the end, I decided to go with a Neopixel strip showing light traveling to the bodies and then coming back.
Here’s how it works:
There’s a pixel strip to indicate the light leaving the sun and heading to Earth. Each pixel lights up to show the lights moving, taking 8.456 minutes to reach the end of the strip (Earth). Each new pixel from the Sun has a new color, so we can track where that sunlight is at.
Then, there is a pixel strip to show the light heading to the Moon, Jupiter, and Saturn, and a return trip back to Earth, each pixel taking the respective total round trip time to reach the end (back at Earth). The strips go up the right, then back down the left for each pair.
Therefore, you can see the age of the light by comparing where the color is in the trajectory.
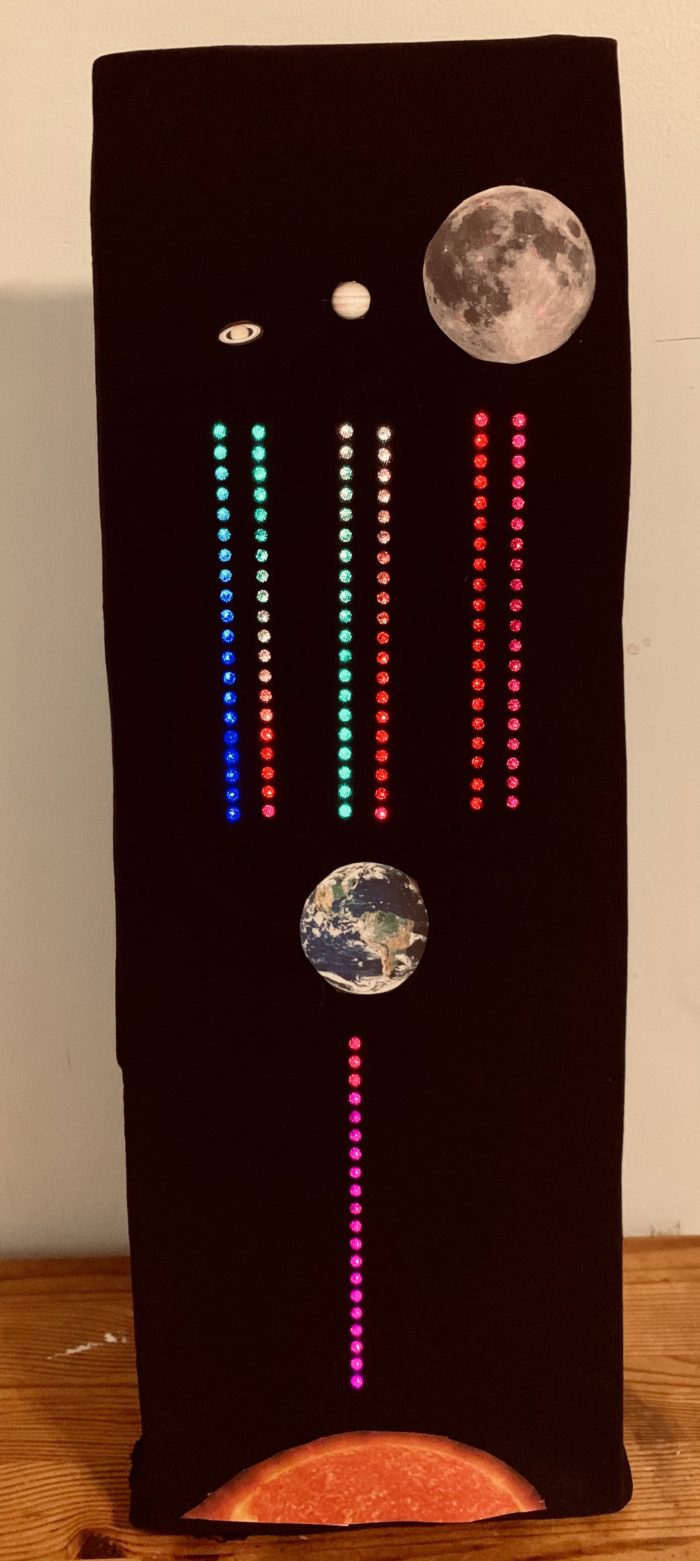
For example, in the image to right [yes, that’s the whole thing mounted – build deets below] you can see that for the most part, the light that arrives at the Earth, from the Sun, has already gone to the Moon and back – there is little difference in the colors, as the trip to the Moon and back is fast (about 2.5 secs).
The same light, the reddish light, is still on its way to Jupiter. And you can see the green light, which is much older, is making its way back to Earth.
The green light that is coming back from Jupiter, is only just arriving at Saturn, which is twice as far from Earth as Jupiter. And you can see that the reddish light still has much more to go to get to Saturn. [see GIF below that’s about 700x accelerated]
Is that helpful to see where that light that left the Sun is in its round trip to the planets and back?
I hope so, as that was the intent.
Thoughts? Comments?
The build
There are 149 Neopixels in this display (go big, or go home). I had started with a 60 pixels/meter strip, but upgraded to 144 pixels/meter strips to give me more colors to work with [and I must say I wrote the code at the start to make it easy to upgrade the number of pixels, among other modifications].
And, not visible behind the Moon, Jupiter, and Saturn, are 9 pixels to light them up (right now they show the light that has arrived at the celestial body). I’m still figuring how to make those more visible. Perhaps changing the representation of the bodies (currently paper cutouts). And, no, there are no pixels for the Earth or Sun. Just didn’t do those.
Powering the pixels is a Adafruit Trinket M0. Each strip is on a pin (the lights behind the planets are appended to the Sun-Earth strip), with the fifth pin being a touch pin. The touch pin toggles between real time mode or 60x speed (speeding it up helped with debugging and with visualization).
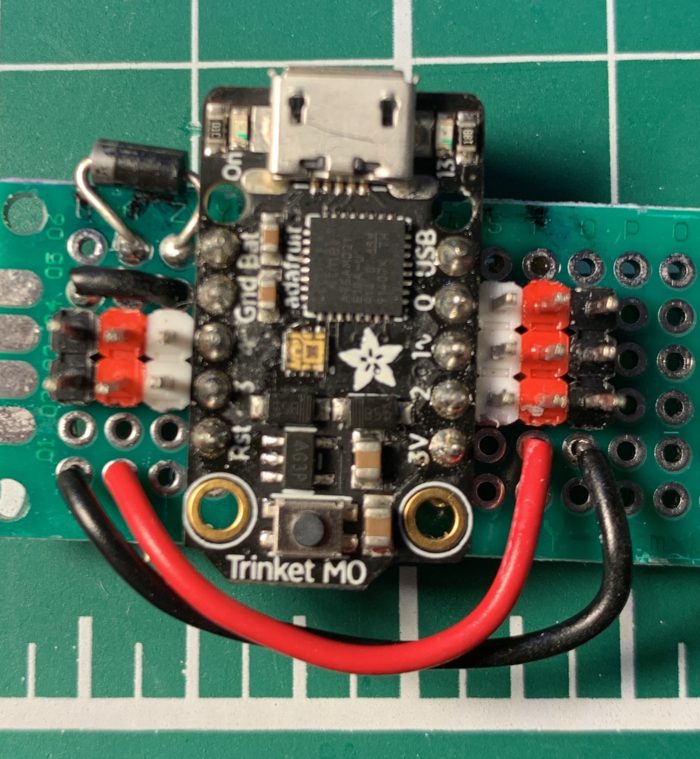
The Trinket is mounted on a perfboard. And there are headers to plug in the Neopixel strips. I decided to give the Neopixel strips connectors, so I can plug and unplug them. Easier to mount and manage and debug.
The Trinket is ready for a battery, and I can power the Neopixels either directly from the battery (thank you Schottky) or directly from the USB – not the Trinket 3V. Though, the first time I plugged in all the strips on battery, the whole thing failed. When I did the math, I realized the batteries I was using were woefully underpowered for all those Neopixels. I still want to try with some AAA batteries (4x). For now, I either plug it into a USB charger or USB battery pack.
The strips were mounted on cardboard with hot glue (so versatile!), the cables feeding through an opening at the bottom to the Trinket and power in back. And I had intended to use dark acrylic, used in many LED panels, to cover the whole thing, but the size I had would have required two pieces. I then realized that sheer black fabric could work and cut the leg off an old pair of running pants and stretched the fabric taught over the pixels. Worked like a charm. I think the verticality of the display made me think pant leg – indeed, it slipped right over the whole thing. I kept the rest of pants in case I needed the other leg. Haha.
The code is simple, written in CircuitPython. The code basically multitasks, and advances the pixels in time, based on their own time frame. Nothing remarkable.
Fun, innit?
*The objects have their own magnitude and sizes, too, but I decided to skip that part.