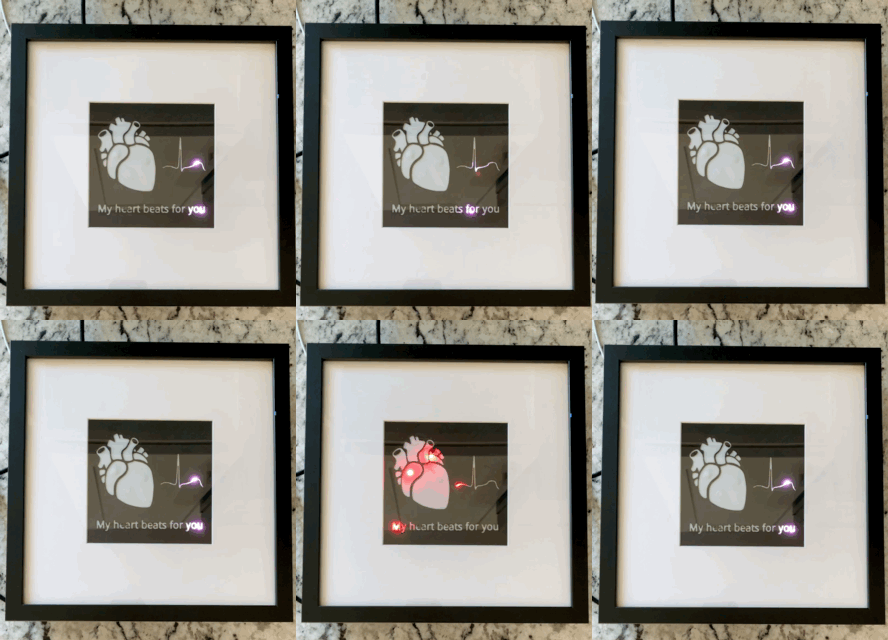
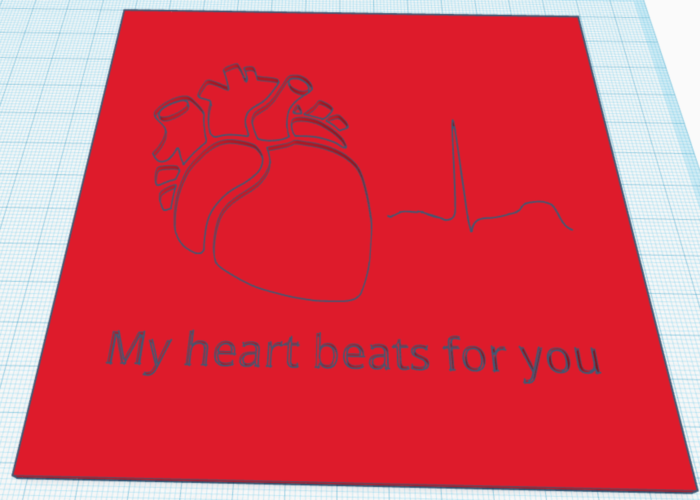
What does Empathy look like? Dignity?

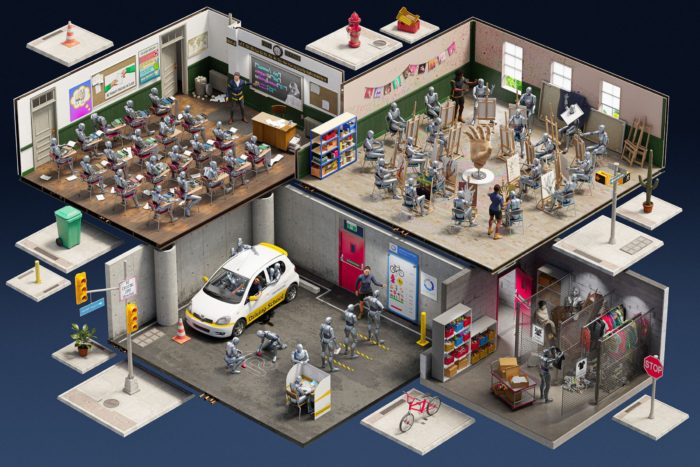
I regularly look for interesting intersections of tech, art, and meaning. This installation on Empathy reminded me of discussions from years ago around how connected mobile devices could be used as ambient emotional connections.

With this installation, I want to show how, through simple interactions, we make new relationships with others and might be made aware that each and every one of these can contribute to the strengthening of humankind. I believe this is the true meaning of empathy. from: Yuki Anai, Empathy

Here’s a poem I wrote (with inspiration and input from the rest of the design team) at a workshop long ago.

Her presence permeated the ordinary,
Lighting our pockets along the way.
We smile, and miss her.
With a sniff of sadness,
She knows we are here.
 
by: Phil, Riitta, Timo, and Charlie
Espoo – 31jan07

This installation on empathy really caught my attention, though, not only because it does that cross-experiential mix-up I so enjoy, but because it tied back to another, more recent thought I had regarding making the intangible tangible.

What does dignity look like?
One of those intangibles I’ve ben pondering is dignity. World and local events have brought human dignity and what it means back to the top of daily discussions. I believe strongly that we should all have a universal commitment to individual dignity, and for us to take the balanced actions we need to take as a society, we need to make decisions informed by individual dignity. Just ask yourself how this year would have been different if the powers that be actually considered human dignity.

So, in my current mind wave around tangible experiences, I’ve asked myself ‘what does dignity look like?’

I’ve not come to an answer or a tangible concept, but this empathy installation would certainly resonate well with whatever dignity would look like.

Image from: Yuki Anai, Empathy (via Creative Applications Network)

Does open sourcing hurt mid-sized hardware makers?

In a recent video, Seon talked about his struggle with open sourcing his products.

He’s in favor of open sourcing, obviously, and makes most of his software and hardware designs available as open source. From what I can tell from the licenses he uses, the code and designs are free to be used, modified, and sold, though with attribution and share alike.

But he’s concerned with the impact he’s seen that open sourcing his works have had on him.

For starters, he keeps finding folks who don’t read or understand or respect his license. I’ve seen him remind folks on Discord to respect the license when they use his work. I can’t image what happens when folks don’t tell him they’ve used his design and he stumbles upon them, perhaps even on AliExpress.

He also points out the work involved in creating documentation while being time starved. And I get it, part of the reason I don’t have my code and design out there is just that added effort in documentation and clean up for reusability (not that anyone is interested in what I make anyway, and my code is quite ugly and useless, haha).

Mittelmachers
Interestingly, in his discussion, he does make a distinction between tinkerers and big folks with a thriving ecosystem, such as Adafruit. Tinkerers are sharing and not looking to earn from that work, so it’s ok to share and share alike. And folks with a large ecosystem and brand can afford to give their designs away freely, as they have a steady business of also selling things to their audience.

Seon sees himself in the middle somewhere. He talks about making open sourcing decisions based on how it affect his business. And it is sometimes unclear to him the value of open sourcing his creations.

Dropping the BOM
This discussion came up when he was explaining why there were a few of his products he would not open source. A reason might be the effort to make something open source, as I said above, especially for something he’s not necessarily intending to sell. But, also, he brought up his concern around giving away what he is working hard to make money and survive on. He wants to give back to the community, but doesn’t want to make it easy for unscrupulous freeloaders to undercut him competitively in sales.

As an example, he talked about why he doesn’t release his BOM or component library. He mentioned how his Gerbers, schematics, and board files are fine to share, but his BOM is too much for him to give away. Yes, he knows that a lot of that info is in the files he shares. But the BOM is basically a shopping list of his components and suppliers, which he feels is a competitive advantage he’s built over years, and giving it away makes it too easy for folks to undercut him.

The business of making
One challenge of going from a tinkerer to one who builds a business on open source hardware is that transition from building a sales stream and being big enough, both in sales and brand, that knockoffs have minimal impact.*

Balancing open sourcing one’s designs and building a book of business has been around for a long time.

And that balance teeters wildly for those who are trying to meaningfully give the community while also trying to protect the business they depend on.

Not an easy balance.

What do you think? How does open sourcing help or hold back early stage hardware makers? How do you balance protecting your business and growing your brand and community?

*Of course, this presumes copycats have negligible impact on sales at Adafruit or Sparkfun or any of the other big maker brands. And I wonder if their path to growth has helped them balance between open and closed, and build resilience against those who might undercut them.

Update, 10 hours later….
Wow, I seemed to have hit a nerve. Very interesting discussion ensued after Seon picked up on my tweet. I think these kinds of discussions are helpful for us to understand the business of making, and the challenges middle manufacturers have.

Here is the tweet if you want to see the thread that ensued.

Image by Nick Fewings

Another tangible concept: seeing through time

I finally finished my second project of my year’s project challenge. OK, I had planned to finish it three weeks ago, but life is needy.

In any case, here it is. And I’m happy with it.

Premise
Earlier this year, I noticed how the Moon, Jupiter, and Saturn were all so close to each other. And I have a particular fascination with the full moon. On 04 July around midnight, when we were returning from a family gathering (outdoors, and members of our COVID-bubble, mind you), I looked up into the clear sky and the Moon was radiant, with Jupiter and Saturn blazing beside it, so close.

I’ve always been cognizant that when we see the Moon and the planets, that we’re seeing sunlight from different times. Everyone knows all the starlight we get has been traveling years (thousands, millions!) before we see it. The same applies to objects in our own solar system, of course.

The stats
Sunlight takes about 8.456 minutes to reach the Earth. The Moon is about 0.02108 light minutes from the Earth [I used this calculator to actually get the ephemera from 04jul20, 23:30, from my coordinates*]. Jupiter and Saturn are 34.559 and 75.1280 light minutes from Earth.

That means while the sunlight we see from the Moon is almost the same you’d see from the day side of Earth, Jupiter and Saturn light are about 1h9m and 2h30m old.

So how to visualize that?

Blinkies
I knew I was going to use LEDs to make this concept more tangible. Obviously.

For the structure, I knew it’d be like a display of some sort. I looked into free form stuff, played with different designs, played with the math. In the end, I decided to go with a Neopixel strip showing light traveling to the bodies and then coming back.

Here’s how it works:
There’s a pixel strip to indicate the light leaving the sun and heading to Earth. Each pixel lights up to show the lights moving, taking 8.456 minutes to reach the end of the strip (Earth). Each new pixel from the Sun has a new color, so we can track where that sunlight is at.

Then, there is a pixel strip to show the light heading to the Moon, Jupiter, and Saturn, and a return trip back to Earth, each pixel taking the respective total round trip time to reach the end (back at Earth). The strips go up the right, then back down the left for each pair.

Therefore, you can see the age of the light by comparing where the color is in the trajectory.

For example, in the image to right [yes, that’s the whole thing mounted – build deets below] you can see that for the most part, the light that arrives at the Earth, from the Sun, has already gone to the Moon and back – there is little difference in the colors, as the trip to the Moon and back is fast (about 2.5 secs).

The same light, the reddish light, is still on its way to Jupiter. And you can see the green light, which is much older, is making its way back to Earth.

The green light that is coming back from Jupiter, is only just arriving at Saturn, which is twice as far from Earth as Jupiter. And you can see that the reddish light still has much more to go to get to Saturn. [see GIF below that’s about 700x accelerated]

Is that helpful to see where that light that left the Sun is in its round trip to the planets and back?

I hope so, as that was the intent.

Thoughts? Comments?

The build
There are 149 Neopixels in this display (go big, or go home). I had started with a 60 pixels/meter strip, but upgraded to 144 pixels/meter strips to give me more colors to work with [and I must say I wrote the code at the start to make it easy to upgrade the number of pixels, among other modifications].

And, not visible behind the Moon, Jupiter, and Saturn, are 9 pixels to light them up (right now they show the light that has arrived at the celestial body). I’m still figuring how to make those more visible. Perhaps changing the representation of the bodies (currently paper cutouts). And, no, there are no pixels for the Earth or Sun. Just didn’t do those.

Powering the pixels is a Adafruit Trinket M0. Each strip is on a pin (the lights behind the planets are appended to the Sun-Earth strip), with the fifth pin being a touch pin. The touch pin toggles between real time mode or 60x speed (speeding it up helped with debugging and with visualization).

The Trinket is mounted on a perfboard. And there are headers to plug in the Neopixel strips. I decided to give the Neopixel strips connectors, so I can plug and unplug them. Easier to mount and manage and debug.

The Trinket is ready for a battery, and I can power the Neopixels either directly from the battery (thank you Schottky) or directly from the USB – not the Trinket 3V. Though, the first time I plugged in all the strips on battery, the whole thing failed. When I did the math, I realized the batteries I was using were woefully underpowered for all those Neopixels. I still want to try with some AAA batteries (4x). For now, I either plug it into a USB charger or USB battery pack.

The strips were mounted on cardboard with hot glue (so versatile!), the cables feeding through an opening at the bottom to the Trinket and power in back. And I had intended to use dark acrylic, used in many LED panels, to cover the whole thing, but the size I had would have required two pieces. I then realized that sheer black fabric could work and cut the leg off an old pair of running pants and stretched the fabric taught over the pixels. Worked like a charm. I think the verticality of the display made me think pant leg – indeed, it slipped right over the whole thing. I kept the rest of pants in case I needed the other leg. Haha.

The code is simple, written in CircuitPython. The code basically multitasks, and advances the pixels in time, based on their own time frame. Nothing remarkable.

Fun, innit?

*The objects have their own magnitude and sizes, too, but I decided to skip that part.

How I made my Game of Life: Contagion Mode, Rose Garden Massacre Edition

A few months back, I made a Multimode Game of Life (GoL) that could do the usual GoL, a mode with two populations coexisting, a mode where one population competed out a second (inspired by #BLM), and a mode, relevant to this discussion, showing the spread of disease through a population (I wonder what inspired that).

Still a few months to go in the year
Yet, 2020 still had a few tricks up her sleeve. The US president (and everyone around him) tested positive for COVID. The suspicion is that an event at the Rose Garden to announce his pick for US Supreme Court justice, where folks were packed in and almost all without masks (see image below), was the start of a super-spreader event.

And then Joey Castillo sparked a thought.

That inspired me: could I change the starting conditions of my GoL contagion mode to reflect this event?

Indeed, I could.

How did I do this?
In the process of building the multimode version, I designed a UI (though, didn’t implement it). The UI required making and positioning bitmap sprites on the matrix grid. To figure that out, I created a spreadsheet with a 16×32 frame that I could layout the UI elements and understand what bitmaps to make and where to position them.

Worked great.

So I figured, I could use this grid to layout a Rose Garden event. And here’s my first attempt. Rows of closely packed attendees, two people on a podium, press corps on one side, some military folks on the other (go check the image above), and one in particular is infected.

And rather than being smart and programming something to convert these pixels to an array, I just typed the values in and dragged the numbers around to fill in all the cells with the right value. Then I brought the values into Word, where I am more comfortable with manipulating text, to create the two starting arrays for the animations (one for the live population, one for the infected population).

I had to tweak the starting condition to be dramatic enough (and please my wife), but was able to get a fun starting condition that looked like the event, and that has that 2020 Super-Spreader feel as everything goes red.

Haha.

Full video below.

Makers in the Mittelstand and the business of making

Long before I started tinkering in electronics, I have had a fascination with the Mittelstand. The Mittelstand refers to small- and medium-sized, usually privately-owned, businesses in the German-speaking countries. To me, they are represented best by manufacturers and exporters of innovative, high-quality, and often world-leading, products, from music stands and microphones, to measurement equipment and precision-molded airplane components.

I avidly read articles I come by on the Mittelstand, because I know how central the Mittelstand is to the German economy. And wonder how Mittelstand-like businesses can be the future of manufacturing here in the US.

My journey of the past 18 months into electronics has made me more aware of a maker Mittelstand. Consequently, I’ve been quite curious about the business of making, what middle manufacturers of electronics mean to the US economy, and the trials and tribulations of running a middle manufacturing electronics business.

Mittelstand, USA
I regularly look for examples of a Mittelstand in the US. While proclaiming the return of big-metal, low-skilled manufacturing makes good news, my preference is for policy and support for higher-skilled, higher-value manufacturing, coming from Mittelstand-like companies.

For example, I met a guy from Central Massachusetts who has a small business coating wires with advanced plastics. Sounds simple, but big companies, like 3M, are some of his (demanding) customers.

An article this past July by the Economist takes a tour of the US Midwest and compares it to the German Mittelstand. The article points out that success in the manufacturing heart of America is still tied to Mittelstand values of small- to medium-sized private business manufacturing, and close ties to policy and government and educational organizations to make it so (a German connection to the region also helps).

Leveling up
Back in March I reach an interesting article by Stephen Hawes trying to make sense of small to large electronics manufacturers. He split the manufacturing into three levels.

Level 1 – Someone at home in their pajamas making something on a Saturday morning with tools and materials available to someone with a hobbiest budget. Scale: 1-100 units.

Level 2 – Someone using some outsourcing and some in-house fabrication techniques to make things at a much larger scale, representing a sizable amount of money and effort. Scale: 100-5000 units.

Level 3 – Traditional mass production, hiring a contract manufacturer and getting things made at a factory, most often overseas. Scale: 5000+ units.

This analysis came out of his experience designing and building electronics for sale. He had a good handle on Level 1. Indeed, tools and accessibility to fabrication techniques mean that anyone can begin at Level 1 (uh, that’s where I would be if I started making products). And he understood how the biggies did Level 3.

Where he saw the challenge was in entering and succeeding in Level 2, seeing a gap in tools, costs, building, delivery that the Level 1 folks don’t worry about and the Level 3 handle at scale.

Mittelmachers
If you tie his article to my long-time interest into the Mittelstand, then you can understand why his article struck a chord. Hence, I am fascinated by so many who are making a go at building a business thru Level 2 manufacturing. Because those middle manufacturers are part of the new electronics Mittelstand.

And when I talk about an interest in manufacturing, I’m interested in the stories, not so much tools and processes.*

For example, Limor Fried, Lady Ada, is, of course, the leading example among makers for the American electronics Mittelstand. A NYC-based manufacturer, providing essential products and jobs, there’s no end to great videos and stories about her and her company. One that I watched today, from Manufacturing Day in 2015, is appropriate for this post.

I avidly follow Seon Rozenblum, Unexpected Maker, who is a talented creator (and whose TinyPico was an early and key part in my obsession with electronics). His trials and tribulations show the struggles of trying to build and sustain a Level 2 business. While Limor started her business out of her dorm room 15 years ago, Seon jumped whole-hog into making only 3 or 4 years ago. In the past year, he’s been trying to make the shift from Level 1 to Level 2 manufacturing, with hiccups (not his fault) along the way. I always find it amazing what he’s been able to accomplish in so short a time.

Not all rosy
There is no shortage of amazing folks building maker businesses. And I avidly read profiles (like this one on Lenore Edman of Evil Mad Scientist) because they contain interesting stories of the various ways folks end up in Level 1 manufacturing and then see an opportunity (and then the challenges) of stepping up to Level 2.

One talented and creative person I follow, Brian Lough, is trying to make a go at building a business off his making. And he’s open about his struggle to take it to the next level. He’s got a day job and also sells products on Tindie. Though he’s also working his ass off to create a revenue stream with YouTube ads and affiliate links. While I think he should likely concentrate on Tindie revenue and view the videos as marketing, it does show and expectation that makers should have all sorts of revenue streams.

Another great example of stories of the business of making that seem to be mentioned but not explored (or at least I haven’t seen explored) is how Adafruit responded to the COVID-19 pandemic, and how it was tied to their experience with Hurricane Sandy. But, fortunately for you, that’s a post for another day.

The maker world is filled with highly talented folks that make everything seem easy. And articles tend to focus on the nifty build, or the cool tools, or great talk. All these folks inspire others to make a go at Level 2. Though, I sometimes feel that there are not enough stories of the sweat and tears and all the hard work that go into it.

Mittelaspiratons
I’m not saying we need more stories on struggles, but I’m looking for more of the stories of the business, the challenges, the successes, the hard work. I find that often the business questions that are asked are around tools and processes rather than ‘why did you do that?’ or ‘how did you overcome that?’. I think such questions are important as more folks are able to aspire to step up from Level 1, up to the Mittelstand.

As I grow in the community, let’s see what stories I uncover.

*Please note: there are many making a go at living off of making. But my curiosity around the business of making is not about those who are trying to make money off of YouTube. Don’t get me wrong. I watch at ton of these folks and try to give them as much attention to pay for their great, and inspiring, videos. And, yes, a business model built on subscribers is still a business. I’m just more interesting the manufacturing side itself.

I have experienced the incessant need to feed media channels. And the expectation that every maker needs a big following to make YouTube money is not helpful. Adafruit and UnexpectedMaker put out a prodigious amount of video. But they have the skills, formats, audience, resources, infrastructure, and time to rapidly do these. And I really do not think they make video for the money, but for exposure, marketing, and community, more likely. In any case, to be a next Great Scott or Simone Giertz you need talent, the ability to focus on writing and producing amazing content, heaps of time, and consistent hard work.

Yes, this post has already become way too long – can you tell that this is a topic that I’m trying to articulate and explore?

Image from Adafruit, of course

Project hiccups already

Today is the 16th of the month. I had challenged myself to a project a month (from 15th to 15th – don’t ask). My first project was a multi-mode game of life to show some concepts of contagion and competition. I was able to do the bulk of the code, but then wanted to polish the project with some enclosures and a UI. Alas, I didn’t. But that was OK, as I actually had something I could show that worked as intended.

From that project, I quickly learned that one month is a short time. I also discovered that I wasn’t obsessed enough to make good use of that month. Days would go by without me touching the project.

True to nature
For the second project, I actually progressed rapidly in setting up the code and design. And then life intervened and demanded some of the energy and time I had hoped to give to this project. So, not only is a month fast, but life has a way to intrude.

I did get the code completed, but this project has a strong build component that I have yet to get to. In the end, I really haven’t completed this enough to show (hence, no pics or vids).

Since at least solid week was lost due to certain priorities, I figured I’d give myself another week to see how far I get. Hey, it’s my own challenge, who said I have to be so strict?

So give me another week to see what I have been working on.

Ideas fermenting
That said, I am already starting the next project. This one has a lot more waiting time to it, and I know the last part will extend it beyond a month. But the main parts can be done in four weeks. And I have to think of how to make use of the waiting times.

Yes, that’s cryptic. And, yes, you’ll have to wait to learn what it is.

Ok, so these time issues are a bummer. But I do like that the challenge forces me to come up with meaningful projects to build or do, driving me to learn new things, do research, explore the contours of my own creative space. I’m going to keep at it, if only for that, even if the time frame is a bit wobbly.

Summary
Already my second challenge project is further behind schedule than my first. I’m giving it some extra time, as the delay this time was due to some unexpected issues of a higher priority. Though I’m already crafting the next project for 15sep-14oct.

Let’s see!

Image by Roberto Bellasio

Multi-mode Game of Life

I’ve reached the end of the first month of my year-long monthly project challenge.* The first project I went with was a version of Conway’s Game of Life.

The project was partly inspired by our Great Pandemic of 2020, but also Black Lives Matter. I wanted to see if I could do modes of Game of Life (GoL) that would reflect those two aspects of our first half of 2020.

Tweaking the rules
GoL has simple rules that count the number of active cells around a cell to determine if they live or die or stay the same. I reckoned I could tweak these rules to get the two modes I wanted: Contagion and Competition.

For Contagion, I calculate if adjacent cells are infected or not. There’s a variable to set how prevalent the infected cells are. Unremarkably, a very small amount of infected cells is enough to take over the whole thing (see GIF above).

For Competition, I calculate how many of the primary population are adjacent to the secondary population. Depending on how aggressive I set it, the secondary population will be displaced (I had harsher words to describe the process, seeing as this mode was inspired by #BLM). I can tweak population sizes and displacement variables to see how quickly the primary population totally displaces the secondary population. In the video below, the section for Competition is a bit long, but that’s because towards the end, I wanted to show a secondary population green glider run into a set of primary population blue pixels and be obliterated (time 0:55-1:01).

I do have two other modes: the Usual mode, which is the regular GoL; and a Cooperation mode, where there are two independent populations, with red pixels marking any overlap.

For your consideration
One goal for my year-long challenge is to make as many of my projects have meaning, basically to trigger a conversation or make a concept tangible. For this project, I wanted to show what contagion or competition looks like.

Contagion is shocking as the red, starting small, washes over the blue population. The Competition mode does allow one to tweak parameters to show slow or fast or no competition between populations. Of course, the Competition mode with no competition looks identical to the Cooperation mode where the two population live side by side and overlap without issue.

Building it
As with all of my projects, I built this piece by piece, learning new libraries and methods along the way.

I found a great RGB Matrix CircuitPython tutorial, by Jeff Epler, that shows GoL on a version of the RGB Matrix I had. After help from Jeff to address a bug in the display libraries for my Metro M4, I was able to quickly get the tutorial running. Then, I modified the code to use uLab for better array manipulation.

The building of the modes ended up being faster than I expected. Once I had the basic GoL working with the new array library, the tweaks to make other modes were done in an hour or two (really just some line tweaks). That’s when I decided to build some menus.

I wanted to use bitmaps for menu icons (the matrix is too small for decent text menus). I started with the tutorials, but immediately ran into an issue in the code that I suspected was really simple to solve. So, I turned to the great folks on Adafruit’s Discord where they quickly noticed a single pesky displayio parameter in one line of my code. I had ignored it, since the code worked with GoL. But these folks knew the finicky nature of displayio and were right to point out the pesky parameter. After changing that parameter, I was able to quickly build some very interesting menus.

The menus were a fun challenge. Bitmaps took me back to when I first started using computers in the 80s. I had to figure out the tools (Excel, Paintbrush, and GIMP) and process to draw the right colors (8-bits!), size (tiny!), and formats, manipulating the bitmaps to work with the display library. Excel was a great tool to mock-up the matrix graphics, too. It was really helpful in drafting and positioning the graphics and figuring out the sprite sheet; made the subsequent coding really quick.

Alas, I dilly-dallied and waited a bit too long to get to the menus and buttons (yes, buttons). I was able to test the menus (see video) and then the buttons (using an I/O port expander). But I got stumped combining the two, so need a bit more troubleshooting there.

In the end, as I am bookending these projects by time, I ‘completed’ the project with GoL in demo mode, cycling through the four modes. I will eventually get to the menus and buttons (almost there!). But another project will be my focus for the next month.

What did I learn?
A month is fast – stick with the project, don’t sit back and ponder and lose time. At the same time, you can learn and do so much in a month. Also, coding went faster than I expected because I spent some time in preparation, figuring thing out, such sketching out the cell logic or mocking up graphics in Excel.

Oh, yeah, I also learned uLab array tricks; CircuitPython code optimization techniques; working with displayio bitmaps, sprites, tiles, gridmaps; and a new chip (MCP23017).

What’s next?
For this project, it’ll be as time permits to put the menus and buttons together. I have all I need and know what work is needed. I also wanted to do an enclosure to make it permanent.

For me, I’m starting the next project I want to get done by 14sep. For that one, you will have to wait.

UPDATE 07oct20: How I made my Game of Life: Contagion Mode, Rose Garden Massacre Edition

*for personal reasons, I’m going 15th-15th rather than calendar month.

Mundane ‘aha!’ moments, mistakes, and mental models

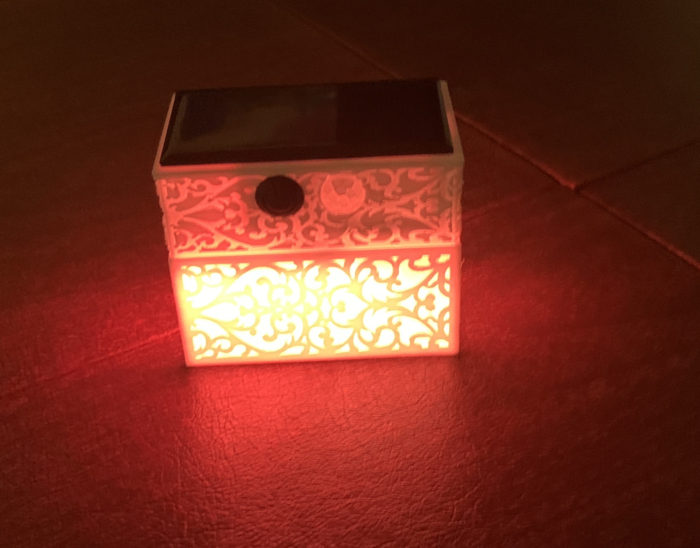
A while back, I bought some LED pendants that I put on my dogs when I send them our into the yard at night to do their business. The pendants help me see where they are and when they show up at the back door.

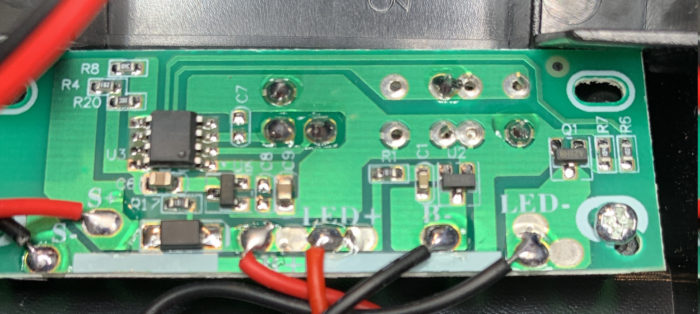
The pendants are really simple: an LED, a 5-pin IC (no markings), a cap and a resistor, and a CR2032 battery all on a simple PCB. Between the battery and the PCB there is some metal that makes a contact when you press the battery.

Being the dunce that I am, I was amazed that with one clicker the pendant could switch from fast blink to slow blink to steady light to off.

Ba-bam!
Then the other night it hit me. What the pendant was probably doing was doing a reset on a chip and the chip knew to cycle between the modes, going into deep sleep when LED was off.

Duh.

Not to be outdone, I wrote up a simple sketch that would do this, fired up my ATtiny programmer, and made my ATtiny45 (and 85) change modes of an LED every time I grounded the RESET, saving the state of the blinking in the EEPROM, going into sleep when the LED was off.

And just now, while writing this up, with this realization in mind, I broke open the pendant again and used my multimeter to find the VCC (pin 2), GND (pin 3), I/O (pin 4), and RST (pin 5) [pin numbering counter-clockwise from upper left in the, seemingly SOT23-5, IC in image to right]**. And with a jumper, I was able to ground the RST pin and cycle through the LED modes.

Mundane leveling up
Ok. I should have thought of this method the first time I opened up the pendant a few months ago and saw the metal clip that was acting as the button. For some reason I was stuck on ‘button’ and thought the cleverness was there.

But really, I don’t think I was ready to think the right way when I first opened the pendant. Something accreted in my mind in the intervening time that allowed me to know have this ‘aha!’ moment.

Also, I am proud of the skills I have gained* to quickly write it up and prove it out.

What I like of these little ‘aha!’ moments is that they push you into another plane of thinking, a new mental model, such that you now think differently from before the ‘aha.’

I suppose experience doesn’t give you the answer as to how to solve a problem, only more ways to think of how the problem can be solved. Before, I was limited, later on, I was not. And not only could I think of the process, but replicate it myself.

An aside on mistakes
I see a lot of newbies being afraid of mistakes. Though they relax when they learn from folks with much more skillz that mistakes happen to all.

For me, mistakes are a learning moment. The mistake teaches you the boundaries of the possible better than blindly following directions can. Through mistakes you can get more ‘aha’s than if you followed the instructions and did everything as you should. The ‘aha’s are important for the growth and expansion of your mental models.

And these mistakes can help you discover things you wouldn’t if you stayed on the path. History is crowded with mistakes that led to ‘aha’ that led to amazing things.

Lean into your mistakes. Better yet, try to make mistakes more regularly.

My wife, who loves to ski, always says, “If you’re not falling, you’re not trying hard enough.”

*It’s been one year since I set out to build my work demo that led to an exploration of electronics. I’m surprised by how much I learned in this time and what I’ve been able to do. Of course, looking forward to the second year.

**No markings means that I’ll have no way of finding what this chip is.

The Twelve Projects of Charlie

Based on my notes, on 15jul20 I will have completed one year since I started researching and designing a project for work that set me off on my crazy maker ride. Thinking of my next year of making, I’ve been pondering a challenge for myself. 

What I came up with is a challenge to do 12 different projects over the course of the year, one for each month. I thought of other frequencies, such as something daily or weekly, but monthly fits in well with what I can do and the nature of the projects I’ve been pondering for the challenge. Also, “12 projects” reminds me of the “12 labors of Hercules”. Haha.

Topic, style, theme
I really don’t have a general topic or style that would tie the 12 projects together other than they have to have a physical component (though not necessarily only chips and hardware). I am, though, challenging myself to have a common thread across all the project: I want to make things that have meaning. 

I love the ingenious and whimsical things I see others make. But, I want to do things that make folks think, or better, reveal things that were not visible before. I think this ties to my efforts at building ‘tangible experiences’, experiences that make the invisible manifest, to make physical representations of concepts.

Awakening a sense of fearsome wonder in the ordinary
When I say ‘meaning,’ I don’t mean beauty. There are plenty of artistic makers creating beautiful things with circuits and chips. I want to do more than beauty. I want to reach for the sublime.

I’ve done some reading over the past years about the sublime and the feelings one has when confronting the sublime. Historically, the sublime is attached to religious connotations, the feeling of awe and fear when encountering God. Indeed, I read an interesting article on 17th century religious fairs that had interactive displays to help folks connect to the sublime and feel the fear and awe of the sacred.

As a scientist, though, I have always been interested in the sublime in Nature, feeling awe and fear at the immensity of the cosmos, the interconnectedness of life, the processes of chemistry, and all sorts of changes that have happened in the past 13.5 billions years of reality.

Why the sublime? Already before the pandemic and the protests, I felt that at so many levels, not that we lost our way (that’s too cliche, and I can go on why that’s a lame cliche at that), but that we could use a reaffirmation of the meaning of being human, in the world, with other humans and organisms. Also, this interest in the sublime ties into my current philosophy of “wanting to spread the love I can give, do the good I can do, focus on me and mine, and grow from there.”

The past few weeks of protest, at the end of a few pandemical months, have really thrown me for a loop and suggest that now is a good time for such an exploration that this challenge affords. Connecting with the sublime, seeing that unseen that sits behind the curtain and in the interstices of our everyday reality could perhaps help us squabble lesss, find meaning in what we do, and become better beings.

Back to the projects
I do not think I’ll be able to connect the sublime with each project. Or the connection to the sublime might be forced. But attempting to connect to the sublime will be in the back of my mind as I choose and make these projects.

Interestingly, sometimes I have a hard time articulating in words something I inuit. Challenging myself to make things that help someone tangibly connect to the sublime and experience awe mighty be a way for me to articulate what I mean.

Let’s see.

image from GreekMythology.com

Working up to a proto step by step

I just posted a description of a tangible concept demo I recently built.

There were a few new things in this, such as learning how to use the serial connection, working with a optical isolator, that I did my usual step-by-step approach to it.

First, I needed to learn how to use serial communication between two microcontrollers. I used a Trinket and an ItsyBitsy I had lying around, connected them, and programmed them to send and receive data on the serial port using a version of the basic Arduino Serial example sketch. Good.

Then, as I didn’t have an optoisolator around, I made one from an LED and photoresistor I had lying around.

I then played around with the serial communication through that, learning about sensitivity, slowness, and the like. But it was enough to nudge me into researching optoisolators to get for the next steps.

Next step was to pass serial communication between the two boards, but via a proper optoisolator.

I’m not going to mention all the interesting errors I did trying to work this up, but suffice it to say, opoisolators are quite interesting chips (and thank good ness for data sheets and application guides from the manufacturer).

Once I understood how the optoisolator worked, I then programmed ATtiny84 microcontrollers to use the optoisolators and wired up a breadboard with jumpers to see if I could replicate things with the bare chips.

When I was satisfied with that, I started adding buttons and more LEDS and added more functionality to the code until I had something working. To clean things up, I then made used some cut-to-size wiring to make it easier to use the breadboard proto.

Here it is, mid-build (notice optoisolator at center not yet connected).

I did a write up here, with a video of the prototype in action.

Enjoy.

Where do I go from here?
I had worked up a proper schematic to help me built the proto. If I were to continue this, I’d make the schematic with a PCB in mind, lay it out, and then get some boards to actually build this – in a much smaller footprint.

Alas, I stopped the project at this stage. Perhaps I’ll get a nudge to pick this up later. 🙂